For home users who have encountered the dreaded “Replace Drum” error with their Brother printer, the situation can be very disruptive—particularly when one is, say, in the middle of an important print job. Fortunately, this error does not always mean you require a new drum unit. Typically, all it takes to restore your printer back to life is a quick fix. This guide takes you through each of these problems and their step-by-step solutions that you can try right in your home.
What Does the “Replace Drum” Error Mean?
Now, before we get to how to fix it, you must understand what is happening. Drum Unit Your Brother printer expends a drum unit to move the toner on paper. The climate can also induce the “Replace Drum” error message on the drum unit as its evolving roll technology will wear or toner will build up over time. This may signal a drum that is near its end, but it may also be a minor glitch to be resolved with some quick adjustments.
Quick Fix #1: Clean the Drum Unit
Sometimes, toner residue or dust can interfere with the sensor and cause the error message to appear erroneously.
- Step 1: Turn off your printer and unplug it to ensure safety.
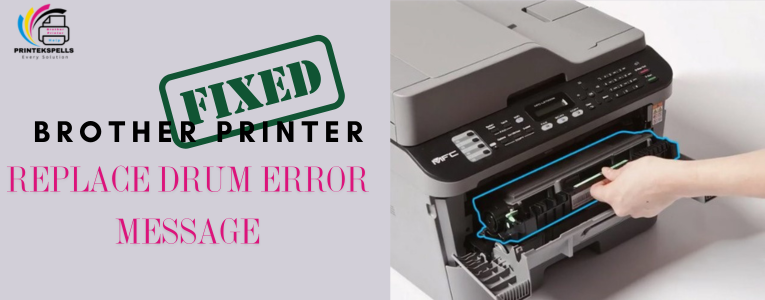
- Step 2: Open the printer cover to access the drum unit.
- Step 3: Gently remove the drum unit according to your printer’s manual instructions.
- Step 4: Use a soft, lint-free cloth to gently wipe away any toner dust or debris from the drum surface.
- Step 5: Reinstall the drum unit and close the cover.
- Step 6: Power on the printer to check if the error has cleared.
Tip: Avoid using any cleaning solvents or abrasive materials that might damage the drum.
Quick Fix #2: Reset the Drum Counter
Even after cleaning or replacing the drum unit, the printer’s internal counter might still be set to the previous drum’s usage, triggering the error.
- Step 1: With the printer turned on, open the front cover to access the drum.
- Step 2: Locate the reset button or follow your printer’s on-screen prompts (this may involve pressing and holding a specific button).
- Step 3: Press and hold the reset button for about 2-5 seconds until the display indicates that the counter has been reset.
- Step 4: Close the cover and turn off the printer, then power it back on to confirm that the error message is gone.
Note: Check your printer manual for model-specific reset instructions.
Quick Fix #3: Power Cycle Your Printer
A simple power cycle can often resolve minor glitches that cause error messages to linger.
- Step 1: Turn off your printer and unplug it from the power source.
- Step 2: Wait for at least 60 seconds to allow the printer’s internal systems to reset.
- Step 3: Plug the printer back in and power it on.
- Step 4: Check if the error message persists.
This method helps refresh the printer’s internal memory and may clear any temporary errors.
Quick Fix #4: Verify Drum Installation
An improperly seated drum unit can lead to error messages even if the drum itself is in good condition.
- Step 1: Turn off your printer and open the cover to access the drum unit.
- Step 2: Carefully remove the drum unit and inspect it for any signs of damage or misalignment.
- Step 3: Reinsert the drum unit firmly, ensuring it clicks or locks into place securely.
- Step 4: Close the cover and power on the printer to see if the error has been resolved.
Quick Fix #5: Update Your Printer’s Firmware
Firmware updates can resolve known issues and improve the overall functionality of your printer.
- Step 1: Visit the Brother support website and locate the latest firmware for your specific printer model.
- Step 2: Follow the provided instructions to download and install the update.
- Step 3: Once the update is complete, restart your printer and verify whether the error message is still present.
Regularly checking for firmware updates can prevent recurring issues and keep your printer running smoothly.
Conclusion
Dealing with the “Replace Drum” error on your Brother printer doesn’t always mean you’re stuck with a costly replacement. By following these quick fixes—cleaning the drum unit, resetting the drum counter, power cycling the printer, verifying proper drum installation, and updating the firmware—you can often resolve the issue on your own.
Regular maintenance not only helps in preventing such errors but also extends the lifespan of your printer. If you’ve tried all these steps and the error persists, it might be time to consult your printer’s manual or reach out to Brother customer support for further assistance.