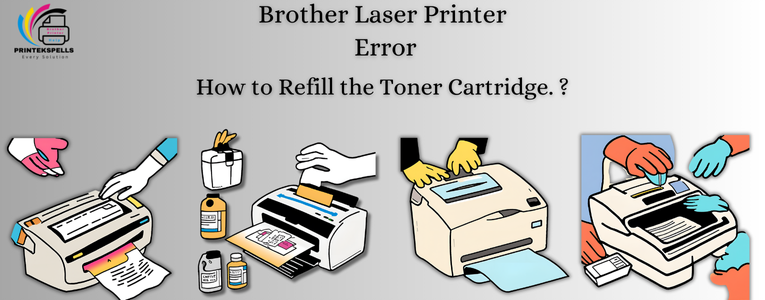
Getting toner low or running out in your Brother laser printer feels like a barricade, especially if you’re doing some important work. No more toner shortage—refilling your toner cartridge is easier (and less expensive) than you think. Here’s the step-by-step process you need to follow so you can be printing again in no time.
What You’ll Need
Here’s what you need to get started:
- A compatible toner refill kit
- Protective gloves and a dust mask (for cleanliness and safety)
- Flathead screwdriver or small drill
- A funnel (often provided in refill kits)
- A clean area to work (don’t use carpeted space)
- Soft cloth or paper towels for cleanup
Step-by-Step Guide to Refilling Your Brother Toner Cartridge
1. Set Up Your Workspace
Find a well-lit, ventilated area to work in. Lay down newspaper or an old cloth to catch any spills, and put on gloves and a dust mask to keep your hands and lungs free from toner powder.
2. Remove the toner cartridge.
- Turn off the printer and unplug it for safety.
- Open the printer cover and carefully take out the toner cartridge.
- Place the cartridge on your prepared workspace.
3. Locate the Refill Port
- Most Brother cartridges have a small plastic plug or cap that serves as the refill port.
- If it’s not obvious, check your refill kit instructions for guidance. Some cartridges may require you to drill a small hole in a designated spot.
4. Open the Refill Port
- Use a flathead screwdriver to gently remove the cap or plug.
- If you drilled a hole, ensure the edges are clean and free from plastic debris.
5. Refill the Cartridge
- Attach the funnel to the toner bottle, and slowly pour the toner into the cartridge.
- Stop filling once the cartridge reaches the recommended level—don’t overfill it.
- Gently shake the cartridge to distribute the toner evenly.
6. Seal the Refill Port
- Replace the cap or plug securely to prevent any leaks.
- If you drilled a hole, use durable tape to seal it tightly.
7. Clean the Cartridge
Wipe down the outside of the cartridge with a soft cloth or paper towel to remove any spilled toner.
8. Reset the Toner Counter (If Necessary)
Some Brother printers track toner levels and may need a reset after refilling.
- Check your printer manual for specific instructions.
- Search online for reset steps based on your printer model.
9. Reinstall the Cartridge
- Carefully place the cartridge back into the printer.
- Close the printer cover and plug the printer back in.
- Turn it on and let the printer initialize.
10. Print a Test Page
Run a test print to ensure the toner is working properly. If you notice streaks or uneven printing, gently shake the cartridge again to redistribute the toner.
Tips for a Smooth Refilling Process
- Use the Right Toner: Only use toner specifically designed for your cartridge model. Generic toner can cause clogs or damage.
- Work Slowly: Take your time to avoid spills and overfilling.
- Keep a backup cartridge: If something goes wrong, having a spare cartridge on hand can save you from delays.
- Check Your Printer Warranty: Be aware that refilling a cartridge may void the warranty.
Common Troubleshooting
- Toner Leaking: Ensure the refill port is sealed properly.
- Error Messages: If your printer doesn’t recognize the refilled cartridge, resetting the toner counter may help.
- Poor Print Quality: Check for even toner distribution by gently shaking the cartridge.
Conclusion
Refilling your Brother toner cartridge is a cost-effective and eco-friendly way to keep your printer running smoothly. By following these easy steps, you can extend the life of your cartridge and avoid frequent replacements. If you run into issues, don’t hesitate to reach out to a professional technician or consult your printer’s support team. Now, go ahead and enjoy uninterrupted printing!